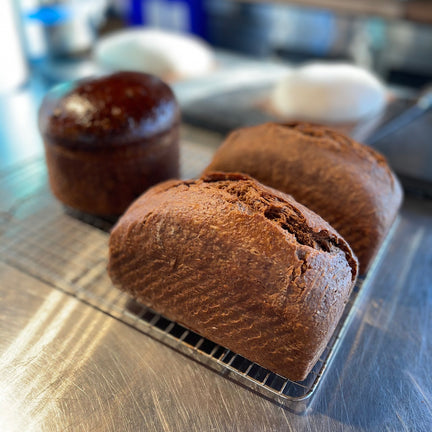
Chocolate Sourdough Bread
Made by Lexi Castagna
You can't make sourdough bread without naming your starter. We'll go first, ours is Sour TCHO.
—
Tools
- Large Bowl
- Dish Cloth
- Sharp Knife
- Sifter
- Bench Scraper
- Dutch Oven
Cooking Time
7-36 Hours
Makes 16 Servings
Ingredients
Directions
- In a large bowl, mix together the starter, water, sugar, and vanilla.
- Add in sifted flour and cocoa powder. Combine ingredients with hands until flour is incorporated.
- Cover and let sit for about 1 hour.
- Fold in salt, walnuts, cherries, and chocolate pieces into the dough. Reform into a rough ball shape and put back into your bowl.
- Now for the bulk fermentation! Your dough should rise to about double its initial size during this process. Cover your bread with a slightly damp dish cloth and place in a warm spot. Note: Depending on the temperature of your kitchen, this can take anywhere from 3 to 12 hours.
- During bulk fermentation, to develop gluten and strengthen your dough, you'll stretch and shape your dough every 30 minutes for the first 2 hours. To start, delicately pull the far edge of your dough up and fold it over to the middle of the dough ball. Make a quarter-turn, and repeat the fold. Repeat 2 more times until you have 4 folded edges.
- Cover and let rise until dough is about twice the size.
- Next up is shaping the dough! You'll want half of your work surface floured, but be sure to keep some space flour-free for the next step. Begin by turning your dough onto the floured surface and gently stretch the dough into a rectangle. Fold the top 1/3 over and lightly press into the center of the dough. Repeat by folding the right side over 1/3, then the left side. Finish by folding the bottom 1/3 over and lightly press. Then, roll the top in on itself towards you until the seam is on the bottom.
- Transfer the dough to your flour-free surface and using your hands, gently cup the sides while moving the dough in a tight circular motion. The dough should be smooth and develop fairly tight tension over the surface.
- Line a bowl with cloth and lightly flour. Then, place the dough in the bowl, seam side up. Cover and let rise again. Note: If you're cooking right away, this should take about 45 to 60 minutes. Or if you'd like to cook the next day, cover and put in the fridge overnight (for about 8-12 hours), just pull from the fridge about 20 minutes before you bake!
- Preheat your oven to 450°F with a dutch oven and lid inside. Note: The dutch oven is important to mimic a professional baker's oven. The hot surface and the lid help steam the bread and create that classic sourdough crust.
- Once the oven is up to temperature, if the seam side of your dough looks a little wet, sprinkle with some flour. Remove the base of the dutch oven from the oven and carefully invert the dough into the center of the dish.
- Using a sharp knife or razor-edge, cut a square into the top of the dough. Cut on an angle to keep the cut fairly shallow.
- Place lid on the dutch oven and bake for 20 minutes.
- After 20 minutes, remove the lid and drop the temperature to 400°F. Bake for another 20-30 minutes.
- Carefully, remove loaf from dutch oven and let cool on a cooling rack.
- Wait patiently.
- Once cool, slice off a chunk and eat as is, slather with some honey butter, or top with some brie and jam...Whatever floats your boat!
- Recipe Notes : For the sourdough starter, we used King Arthur Flour's guidelines. Fun Tip: we've found that naming our starter helps us make sure it's fed regularly!


